TL;DR: A proper hardwiring interference test is about proving your dash cam has clean power, a solid ground, and stable signals before the wiring gets hidden. When installers check ACC vs constant power, load behaviour, ground quality, and cable routing, they catch the stuff that causes random reboots, flaky Wi Fi, GPS dropouts, and rear camera flicker later.
Key takeaways:
- Clean power under load matters more than a “12V” reading on a meter
- Most “interference” complaints trace back to grounding and cable routing
- Parking mode can expose issues you will never see in a quick daytime test
- Small changes like a cleaner fuse tap or rerouting a rear cable often fix the problem fast
Hardwiring a dash cam can look straightforward, but a good install is not just about hiding cables. It is about clean power and clean signals, which is why a proper hardwiring interference test matters.
Interference can sit quietly until the day you actually need the footage. When it shows up, it usually looks like fuzzy audio, random reboots, GPS dropouts, flaky Wi Fi, or new radio static after the install.
What Interference Looks Like
Interference is unwanted electrical noise that disrupts dash cam power or signals and can lead to dropouts, glitchy footage, flaky Wi Fi, or features that work in the driveway but fail on the road. It can be obvious, like radio crackle when you accelerate, or subtle, like a rear camera that flickers only when the rear demister is on.

Common interference sources
Most interference comes from the alternator, ignition, LED drivers, chargers, and aftermarket add ons, especially with poor grounding. It can also come from the install if you tap a noisy circuit, choose a weak ground, or route cables too close to sensitive looms.
Why hardwiring reveals interference
Accessory power can hide noise, while hardwiring ties into the fuse box and chassis so weak circuits and dirty grounds show up fast. Parking mode keeps the camera active with the car off, changing what stays live and exposing issues you will miss in a quick daytime check.
The Installer Mindset: Test First, Then Tidy Up
Good installers do not rely on “it should be fine.” They test in stages, because interference is easier to catch before trims go back on and cables disappear.
In a proper install, the goal is a factory finish that works every day, not a quick job that looks neat but acts up later. That is why good installers build checks into the process, especially when drivers want parking mode, multi channel systems, or battery packs.
Baseline check
Before hardwiring, installers can take a quick baseline reading of the car’s behaviour. That can include a short radio check, a quick look for existing warning lights, and confirming what accessories are already installed.
This is not overkill, it is proof. If a car already has noise on the radio or a dodgy 12V accessory, you want to know before the dash cam gets blamed for it.
Step by Step: How Installers Run a Hardwiring Interference Test
A proper hardwiring interference test is not one magic tool or one button. It is a series of quick, practical checks that confirm clean power, clean grounding, and stable signals.
Bench testing before the camera goes into the car
Installers often power the dash cam and hardwire kit from a clean, stable supply before touching the car, just to make sure the gear behaves. If it glitches or reboots there, you know you are dealing with the camera or wiring, not the vehicle.
Confirming ACC and constant power the right way
Installers confirm true ACC and constant circuits with a multimeter so the camera gets stable ignition and always on power. They also check how the voltage behaves under load and during ACC on off to make sure the camera enters and exits parking mode without dropouts.
Load test
A circuit can read 12V and still sag once the camera starts drawing power. Installers load test with recording, Wi Fi, and the rear camera running to catch dips that can corrupt files, miss clips, or trigger reboot loops.
Ground check
Most “interference” problems are really ground problems, so installers use a clean, solid chassis point and avoid paint, loose hardware, or shared noisy grounds. The goal is a stable, low resistance path that stays consistent with vibration, heat, and accessories.
Cable routing check
Even a neat install can pick up noise, so installers keep runs clean and route cables away from high noise looms. This matters most on a rear camera setup, so if you are planning a 2 channel dash cam install, a small reroute can often fix flicker, dropouts, or audio noise without changing any hardware.
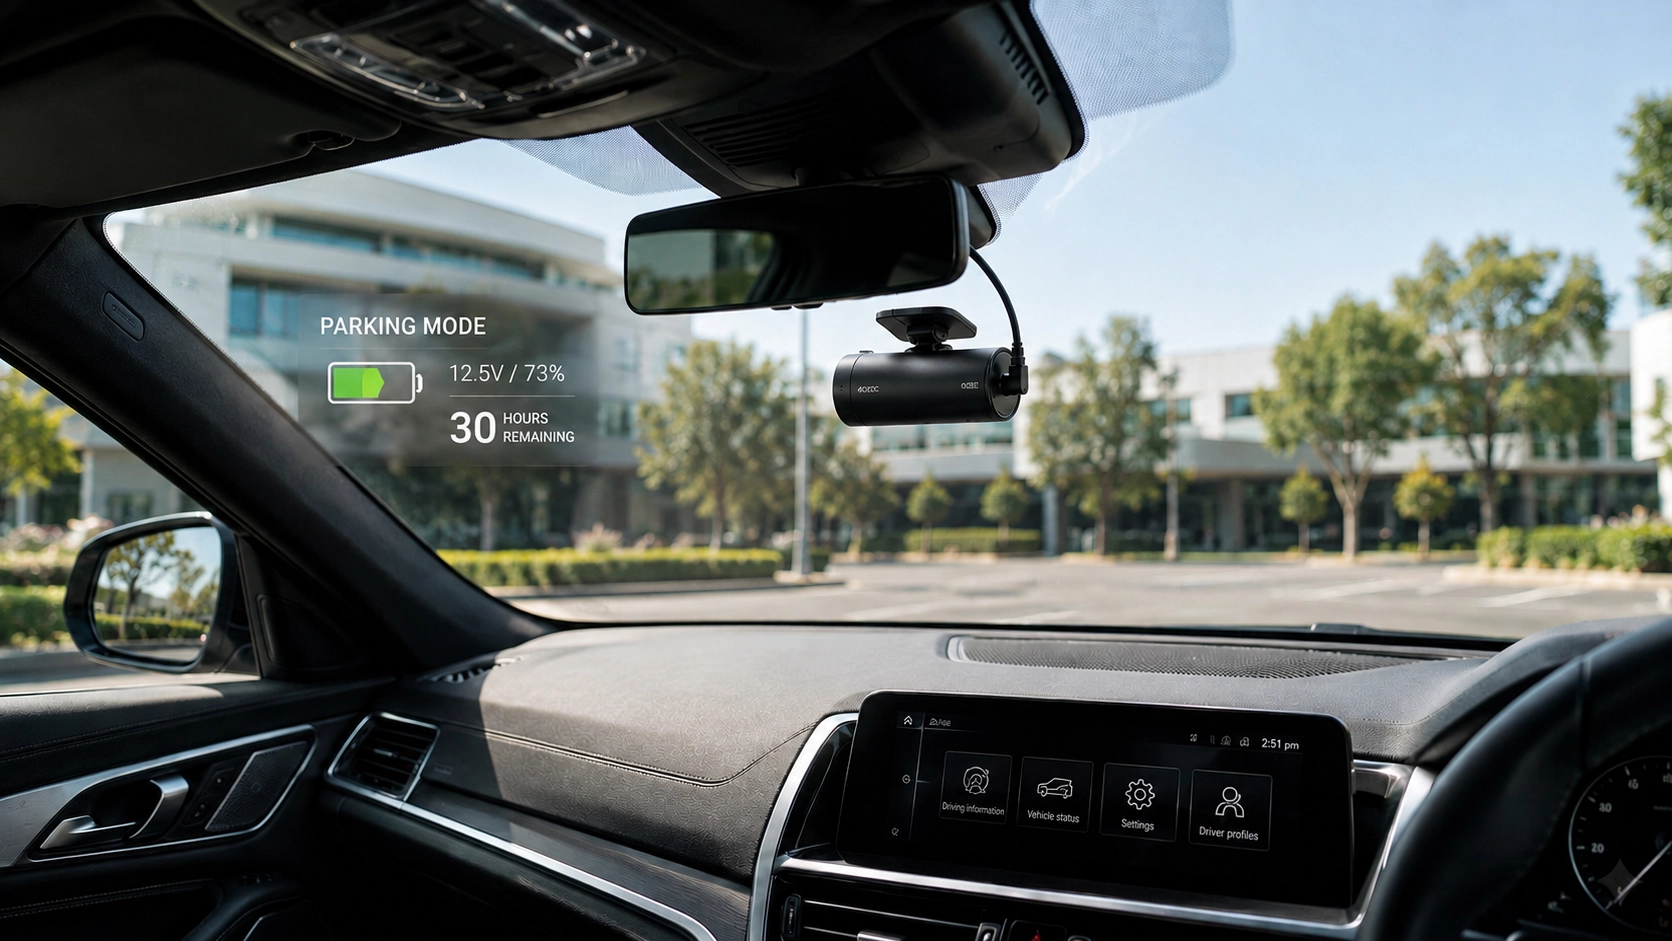
Parking Mode: Where Interference Shows Up
Parking mode is a big reason people hardwire, but it also changes the game. The camera now relies on constant power and a proper low voltage cut off strategy, and any weakness shows up over time.
Voltage cut off and sleep behaviour
If the cut off is mis set or the power path is noisy, the camera may shut down early or behave inconsistently overnight. Installers confirm cut off settings, verify parking mode triggers, and check that the camera returns to normal recording cleanly.
Long duration stability checks
Some issues only show up after the camera has been running for a while, so installers let it record and check for heat, clean files, and stable start stop behaviour. This is especially important for parking mode, because a system that looks perfect on day one can still let you down-
When Interference Is Not the Dash Cam’s Fault
Sometimes a dash cam is just the first thing that notices an existing electrical problem in the car.
Common culprits include:
- Weak battery or tired alternator
- Noisy aftermarket accessories on shared circuits
- Poor grounds or cluttered wiring from previous installs
A good installer will call that out, pinpoint what the camera is reacting to, and fix the cause instead of masking the symptoms.
Common fixes after a failed test
If an interference test flags a problem, it is usually fixable without drama. The key is knowing which lever to pull first so you do not chase ghosts.
Move to a cleaner fuse
Not all fuses are equal, even if they show the same voltage. Installers may move the tap to a different circuit that behaves better under load and has fewer noisy neighbours.
Improve the ground
A better ground point can solve issues that look like a defective camera. Cleaning the contact, choosing a different bolt, or using a more stable grounding location can remove noise and reboots.
Reroute the cables
Sometimes the fix is simply a smarter path. If the rear cable is running too close to a noisy loom, rerouting can restore stable video instantly
Add filtering or a battery pack
In some vehicles or setups, power filtering or an external battery pack can be the cleanest answer. Battery packs can deliver stable power for parking mode while reducing stress on the vehicle battery.
Why Choose DNH Dash Cam Solutions
If you want an install that looks factory and stays reliable, DNH Dash Cam Solutions tests the details instead of hoping for the best. They are Melbourne based and offer mobile installs within roughly 50km of the CBD, so you can get it done at home or work without losing a day.
They supply and install 1, 2, and 3 channel dash cams for cars, SUVs, vans, and utes, with hardwiring through the fuse box for proper power and parking mode. With 25+ years of combined industry experience, they can recommend a setup that suits how you drive and install it safely around modern vehicle electronics.
Ready for a Factory Finish Install Without the Headaches?
If you are in Melbourne and want your dash cam installed cleanly with parking mode done properly, book with DNH Dash Cam Solutions and get it sorted by pros who test the details. Use the online booking form to lock in a time, or contact the team for advice on the right camera, hardwire kit, or supply and install package for your vehicle.
Call us for an install that includes a full interference check so you can drive away confident.